|

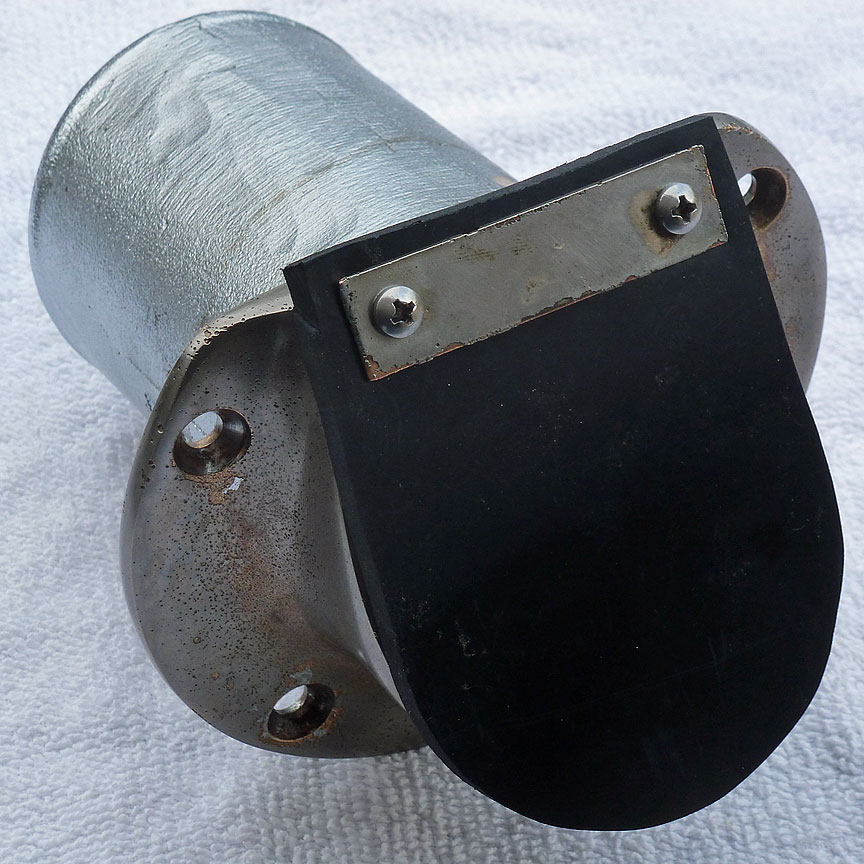
It all started with . . . Thru-hull exhaust fittings with flaps are designed to prevent back-flow to the exhaust system or manifold when the boat is stopped, moving slowly or backing down. Late in the 2012 season I noticed a flap was missing on a friend's 1973 Resorter. I removed the remaining one to use as a pattern for a new one. Below: Top layer (the pattern) is the 1973 original; it's kinda stiff. Its mate was missing. The four new ones (for my boat and friend's) are a bit thicker, but much more flexible. A friend-of-a-friend gave me -- some very high quality neoprene belting (CLICK) -- usually used to transport coal in mines and power plants. I rough cut four pieces, stacked them with double sided tape beneath pattern piece, then band-sawed and sanded them to shape. The machine screws are 8-32. I had to make another "clamp strip" because friend's boat had lost it along with its flap. So both our boats will have new flaps next season.

I wondered if I should use "loctite" on threads. A mechanic friend wrote: "Align the screw slots vertical & wrap 2 pieces of stainless safety wire behind the plate, crossing down through the screw head slots." Well, that sounds like an excellent idea -- so I'll do it.
If I do use Loctite, it's pretty clear that only the "blue" should be used in this application.
This photo, made before I rebuilt the boat (and its swim platform) shows where the flaps are employed on my '81 Century Resorter 18:

Of corse, when I went to install the new flap on my boat's port exhaust fitting, I managed to break one of its machine screws:

To fix it properly, I'll have to remove the fitting. Darn!
I didn't report this earlier, but after breaking off the one on the left, I figured I'd make sure the one on the right was "free," so ran its screw back in after oiling it a bit. I also wanted to confirm its depth.
I discovered the tap handle won't let me turn the tap -- because of the angle of the fitting's face. But today (11/24/12) I did manage to clean up the threads on the right-hand hole (port fitting), turning the tap with vise-grip plyers.) A new SS 8-32 screw now moves in and out easily. The exhaust fitting will have to be removed from the transom for repair. ^%$#@!!
11/25/12 -- I replaced the stbd flapper today. Took awhile to get the old 8-32 screws out, but new flap w/new SS screws are installed; threads chased, etc. -- it's finished! Here's the result of some "Century" advice (by Fred C.) to "pull and wiggle and twist and pull and wiggle and twist and so on and so on." (I also added some strong language which may have helped a bit.)

It will now be quite easy to remove the broken screw, chase the threads and install a new 8-32 SS screw.

Questions:


Removing the screw wasn't an easy task. Good thing I have a machinist friend in Bud E. Even he was challenged by the task. Too much to go into here, but it involved a broken tap.


(12/7/12) IF I can get it back together tomorrow . . . 

It was a real pain getting the broken-off machine screw out of the flange. But it's been removed, chased with a tap -- that also broke -- and has new SS screws holding the new rubber flaps are in place. (Almost like new.) BTW, here is the labeling of the black exhaust pipe:


The length of the long piece is:

That's a 100 watt bulb in the pipe. With the pipe warmed, I used this to wedge the pipe open a bit, making it easier to slip the pipe on the thru-hull fitting.


Bedded with Permatex 80022 (6B):


Some boats have 'em, some don't:

|